Setup & manage plants
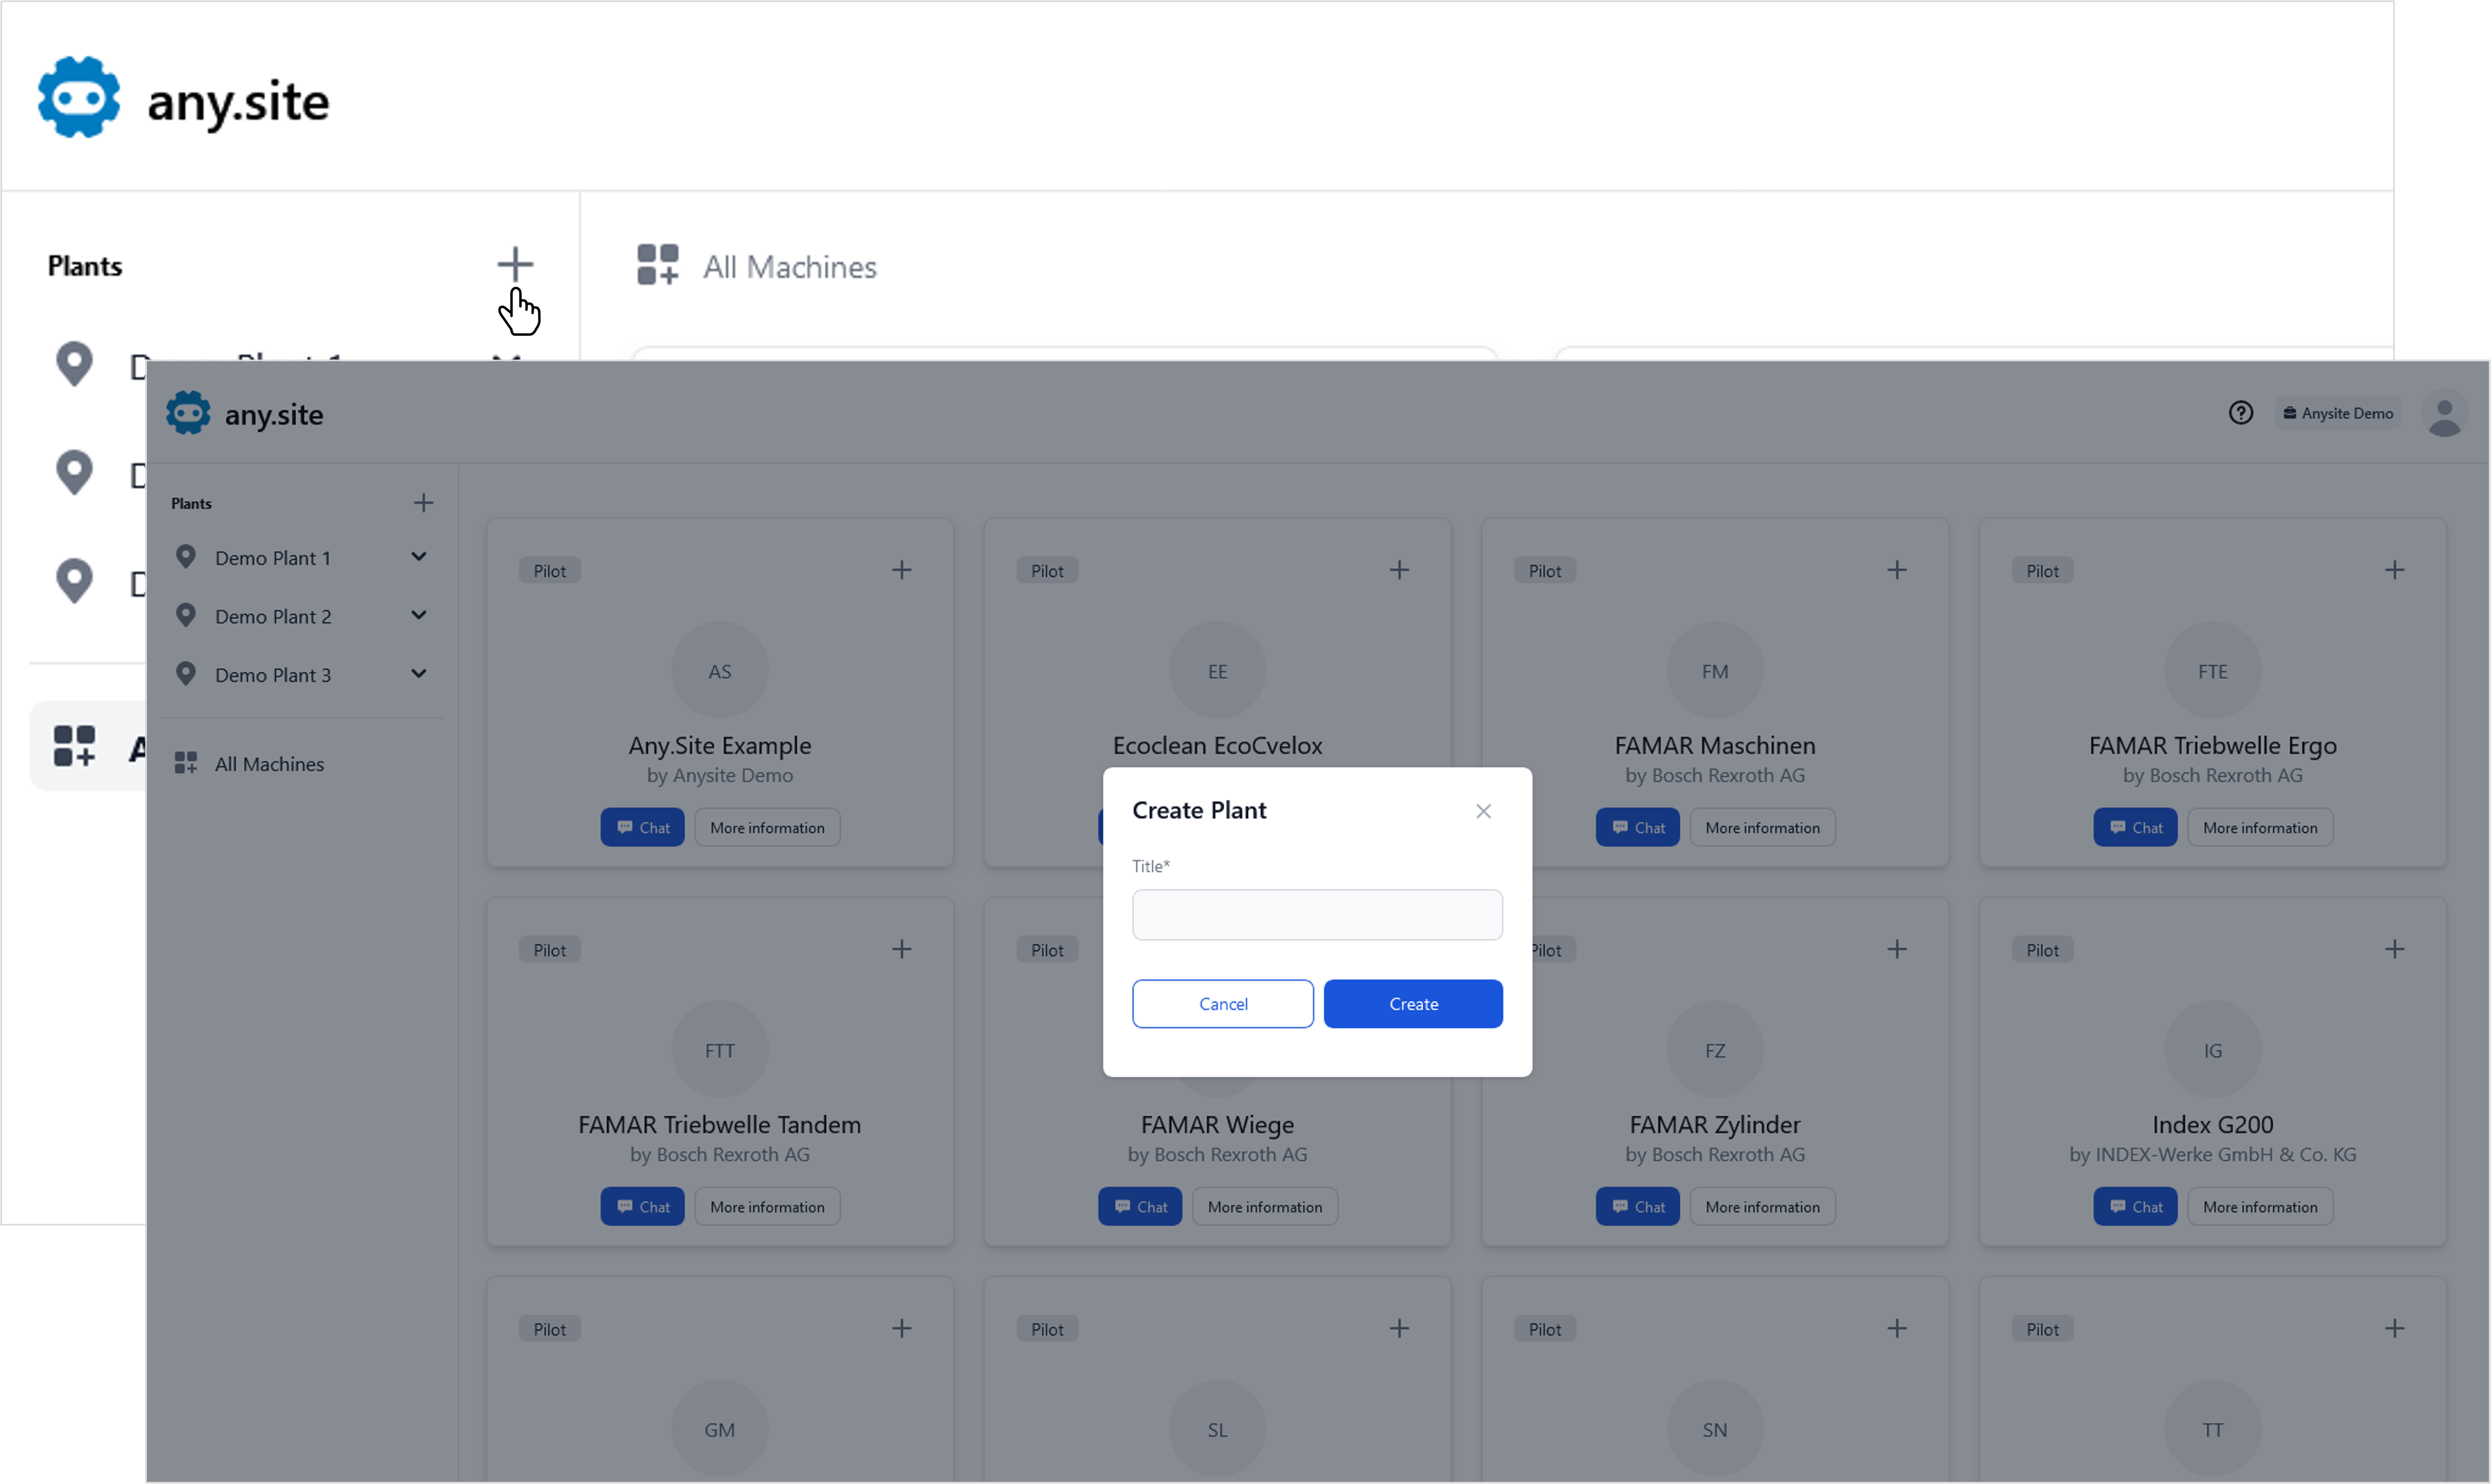
Create a plant
-
Click the plus sign next to the Plants heading in the menu on the left.
-
Enter the desired title in the pop-up window and click Create.
-
Your newly created plant will now appear in the list in the menu on the left.
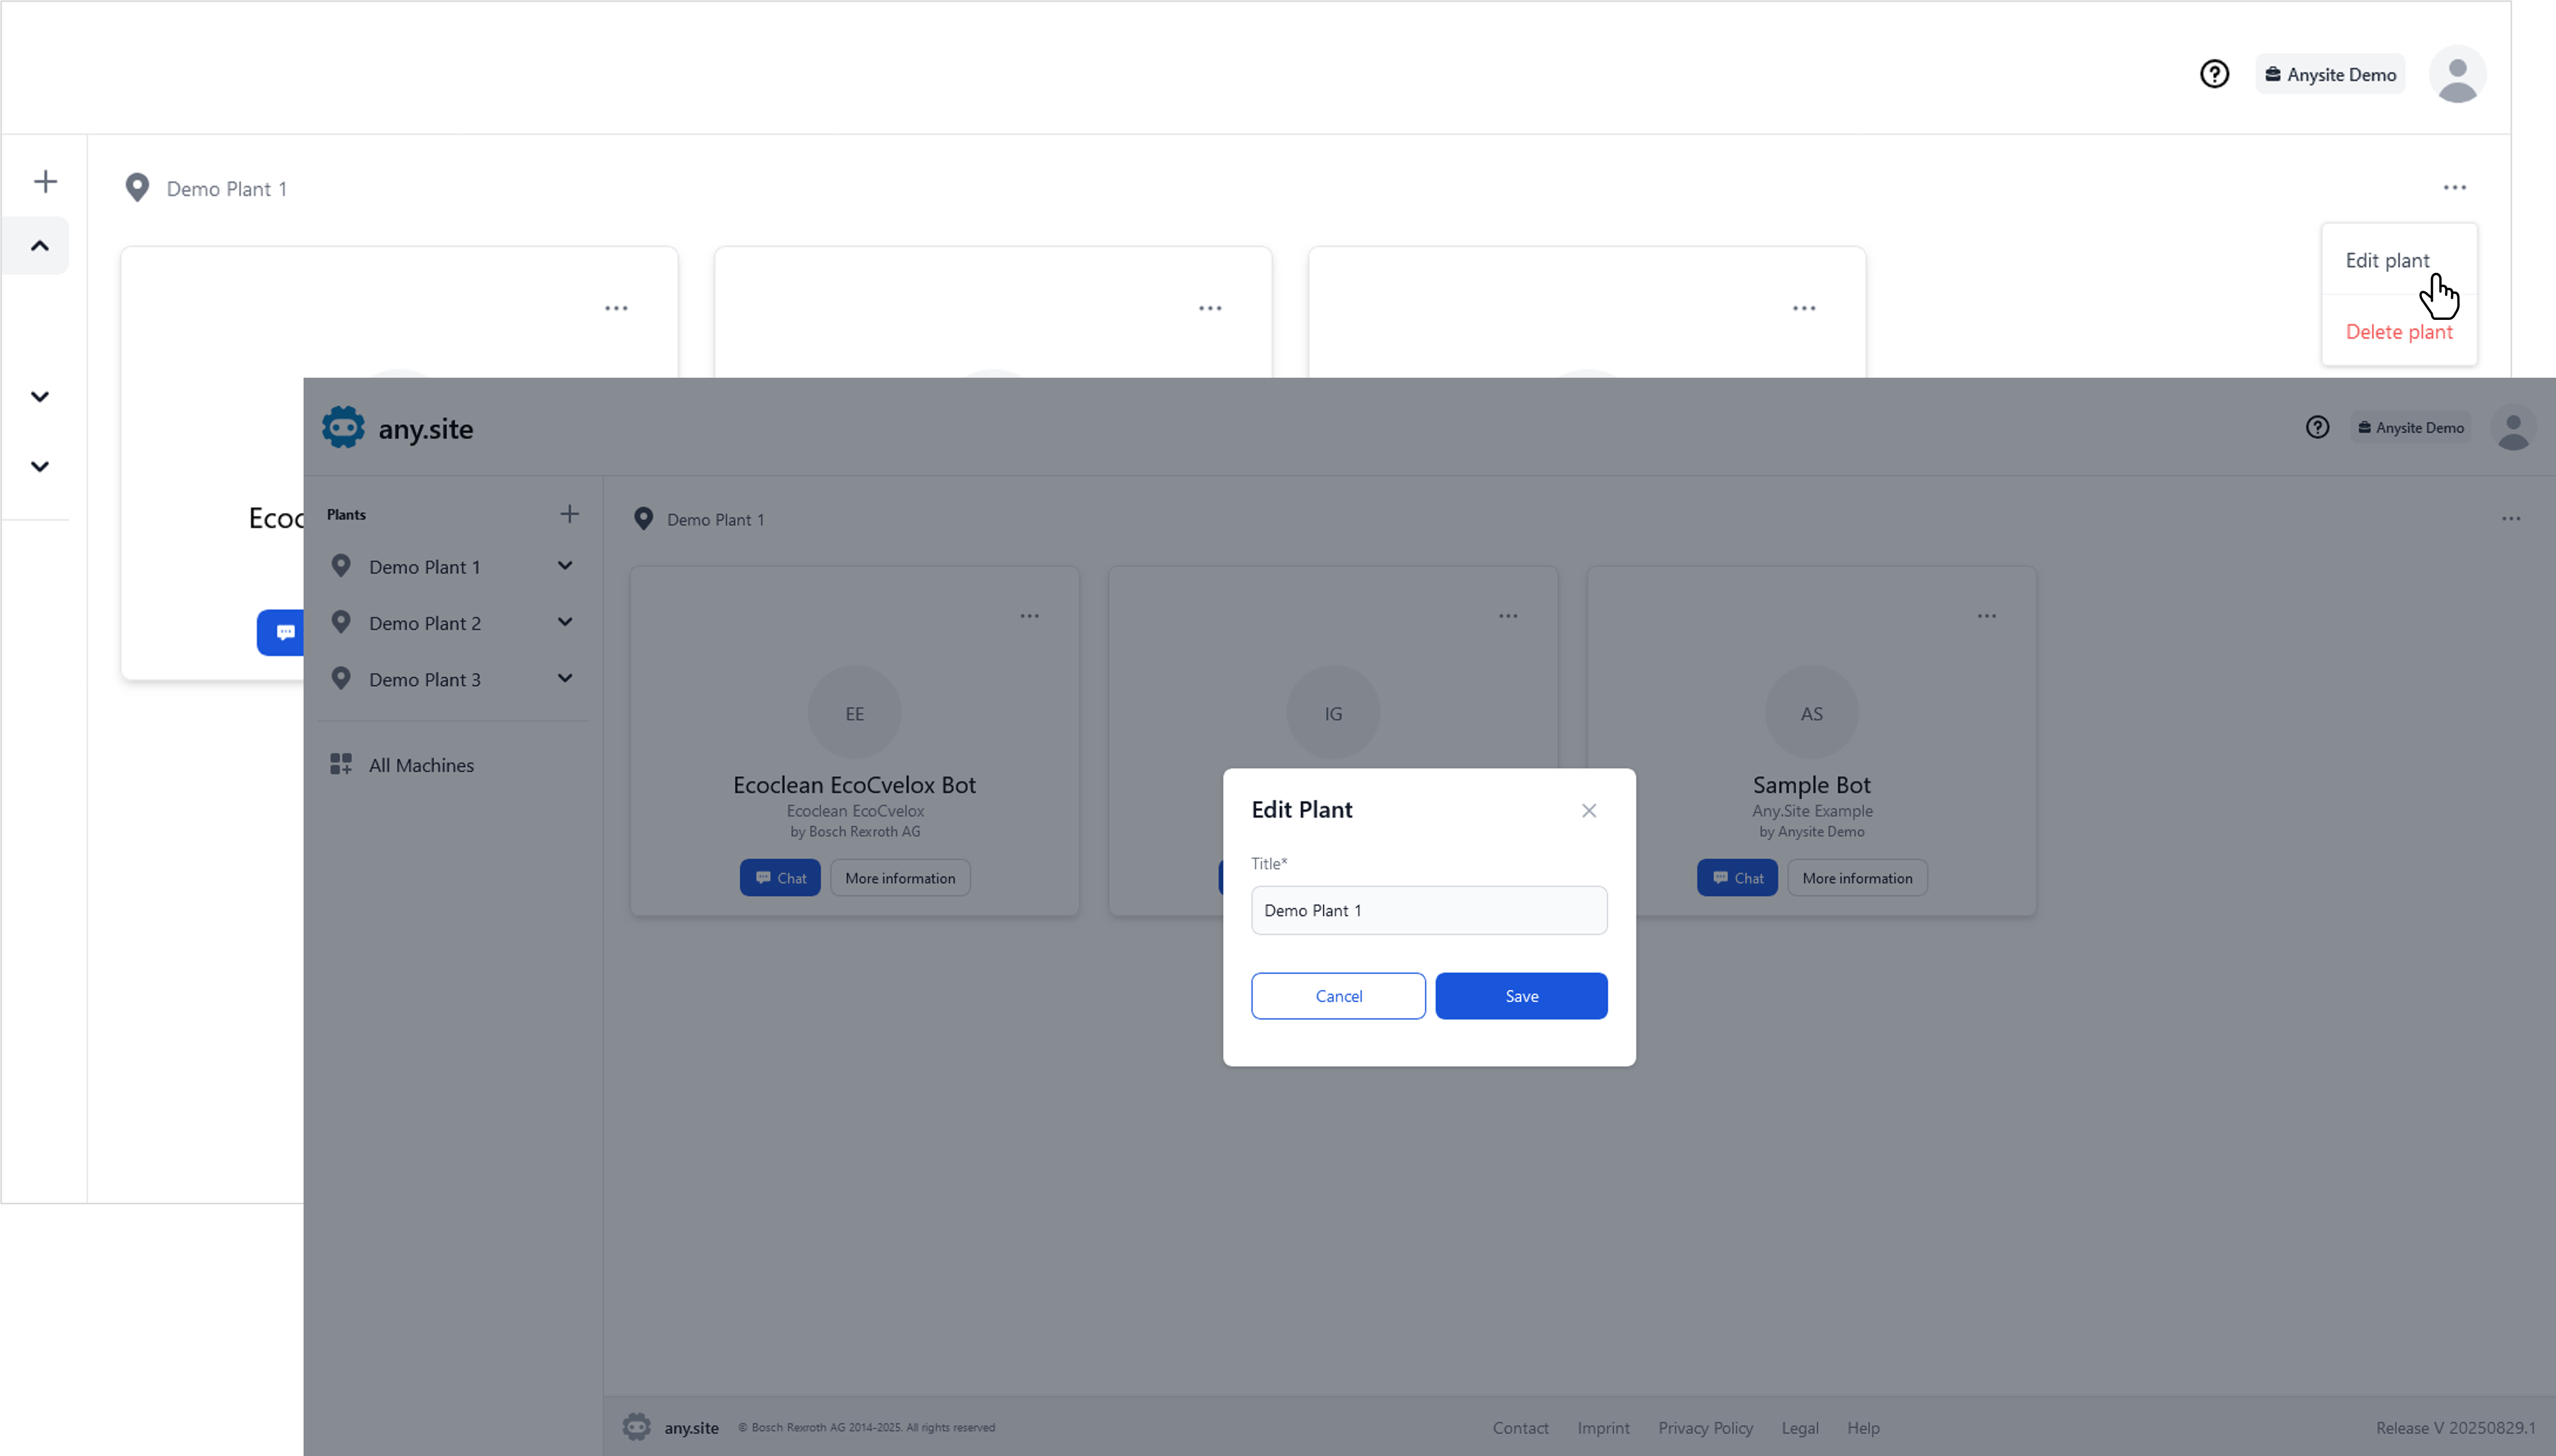
Edit plant details
-
Open the overview of your plant by clicking on it in the menu on the left.
-
Click Options in the top right.
-
Click Edit plant, enter the desired title in the pop-up window, and click Save.
Delete a plant
-
Open the overview of your plant by clicking on it in the menu on the left.
-
Click Options in the top right.
-
Click Delete plant and confirm the action by clicking Delete in the confirmation dialog.
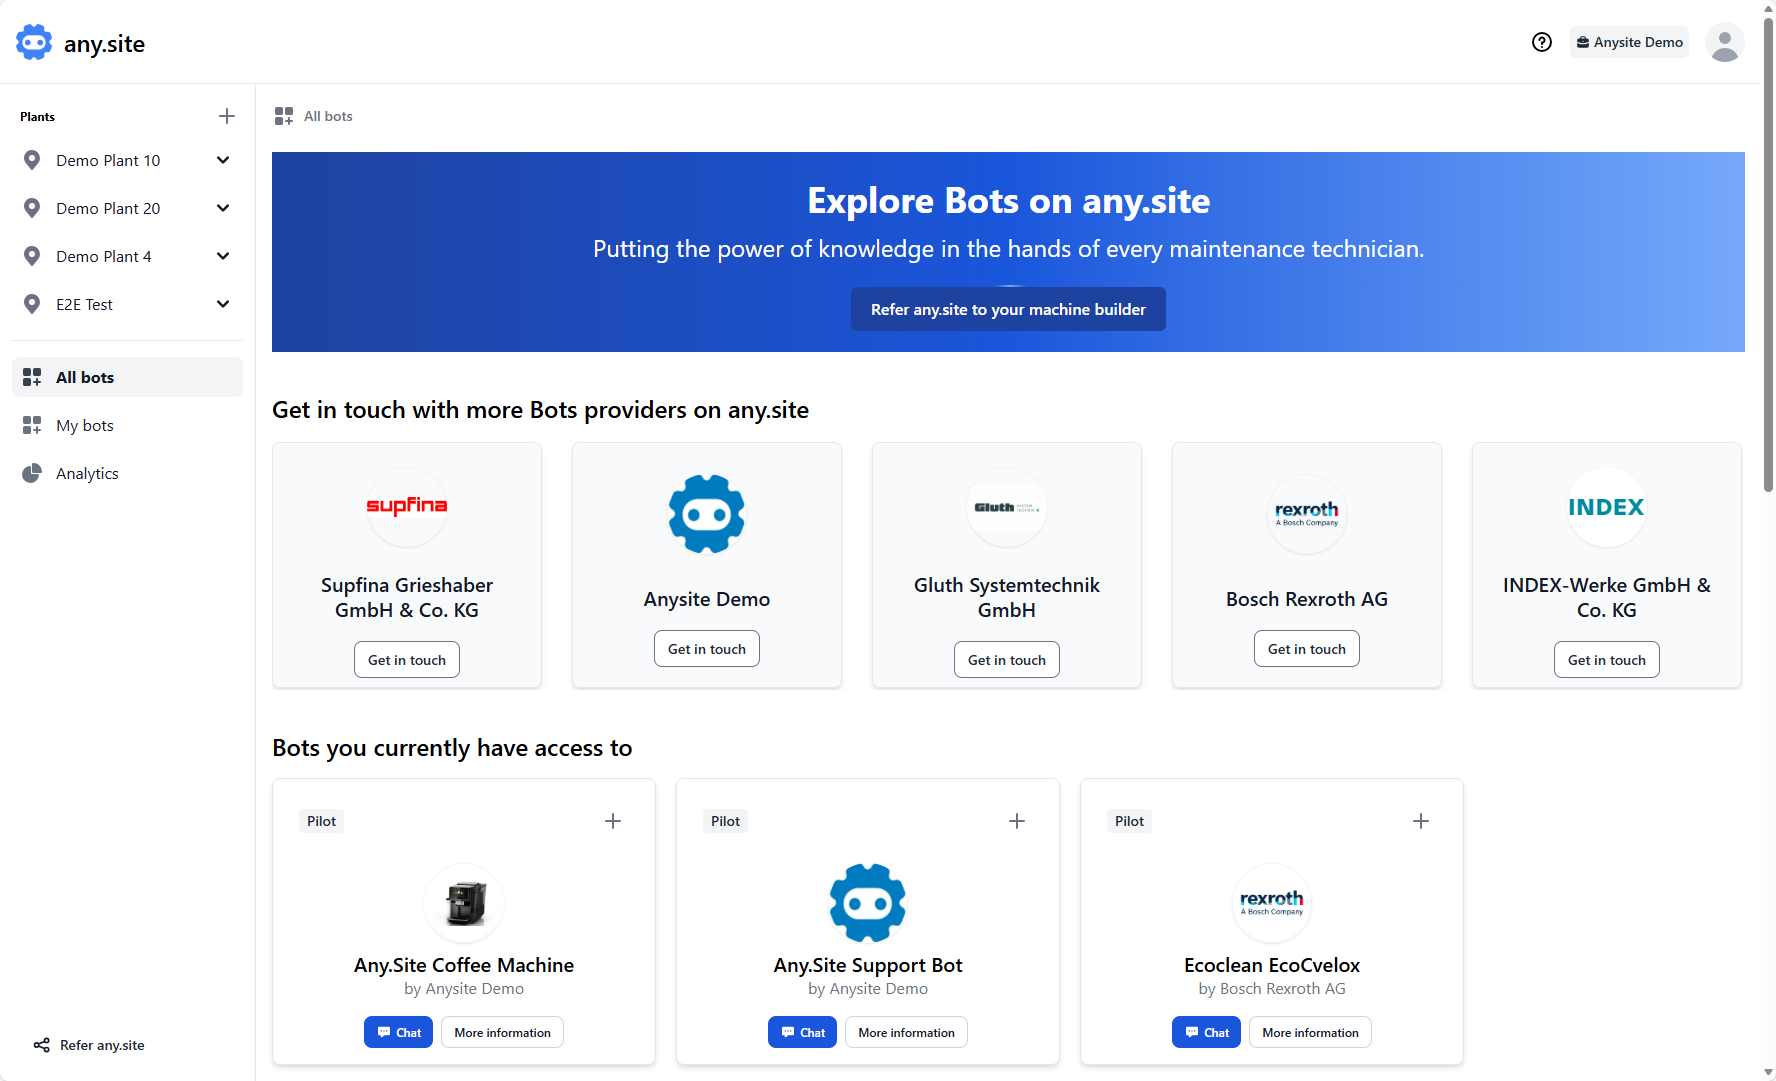
Explore all bots
-
In the left navigation panel, select All bots to see all bot providers connected to any.site.
-
To contact a bot provider, click the Get in touch button on their card.
Note: You can also refer a new bot provider to any.site using the referral option on this page. -
Scroll down to view all bots you currently have access to.
-
Bots listed here can be added to your plants as needed.
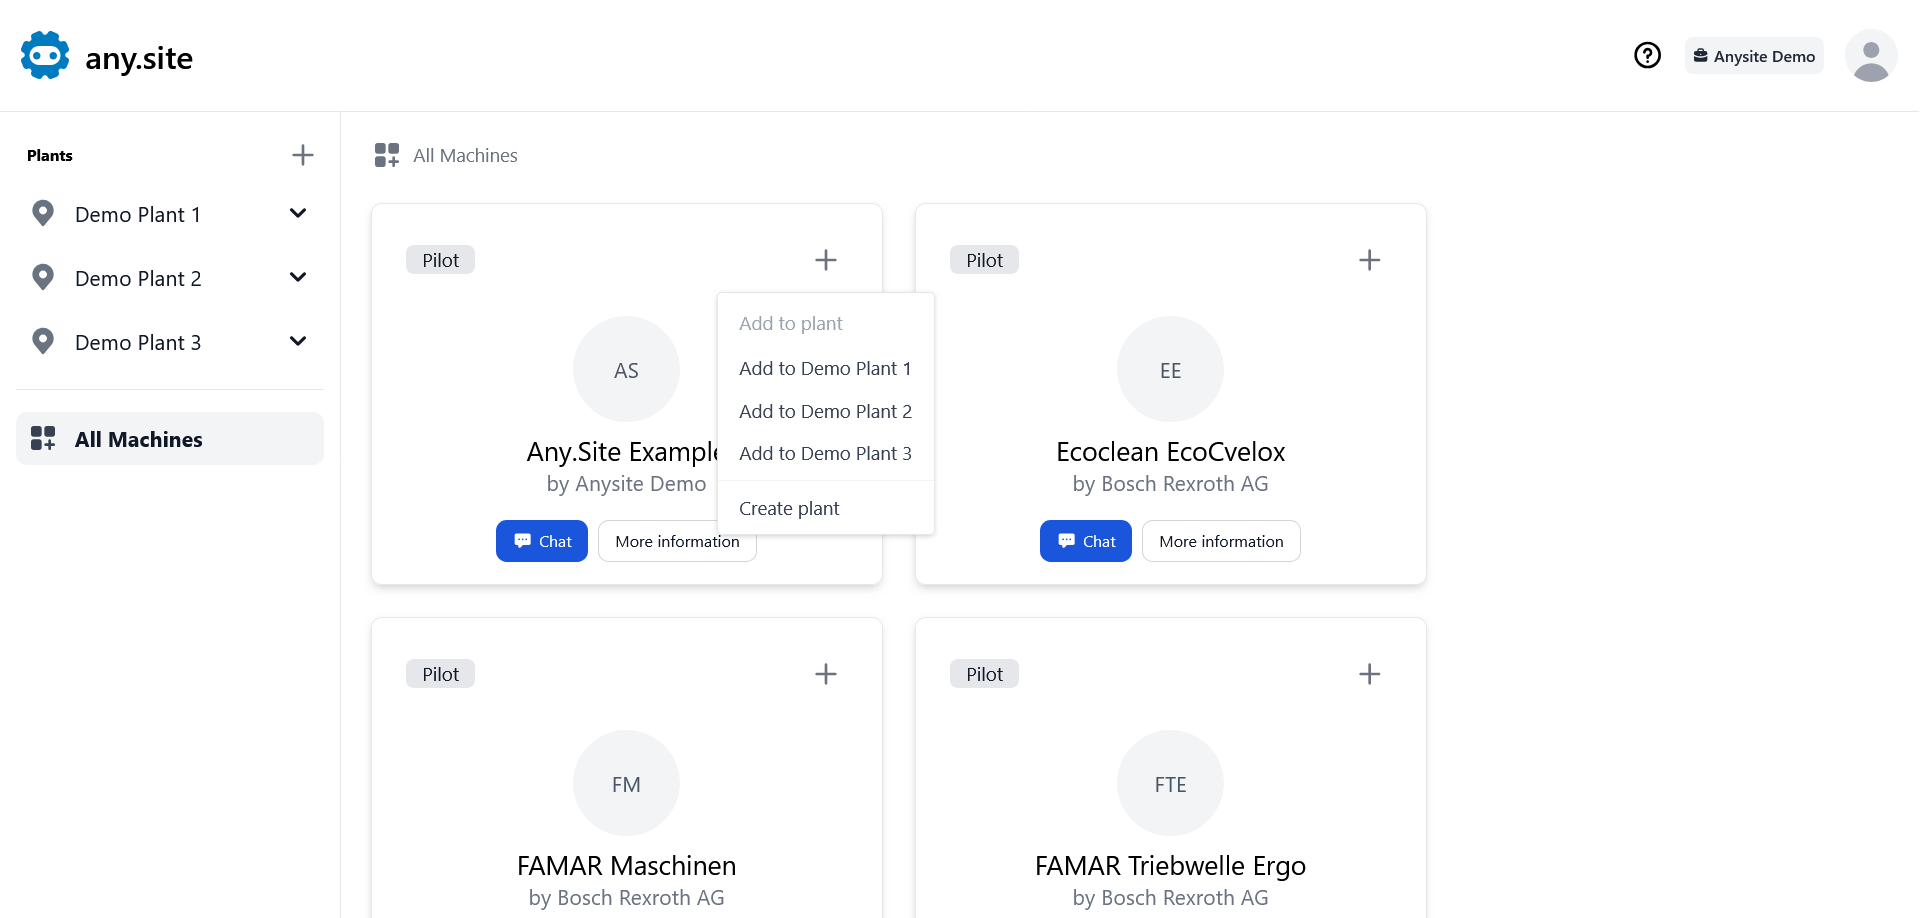
Add a bot to a plant
-
Open All bots by clicking on the left menu.
-
Click the plus sign in the top right corner of the bot tile to add the desired bot to your plant.
-
Select your plant from the dropdown menu or click Create plant.
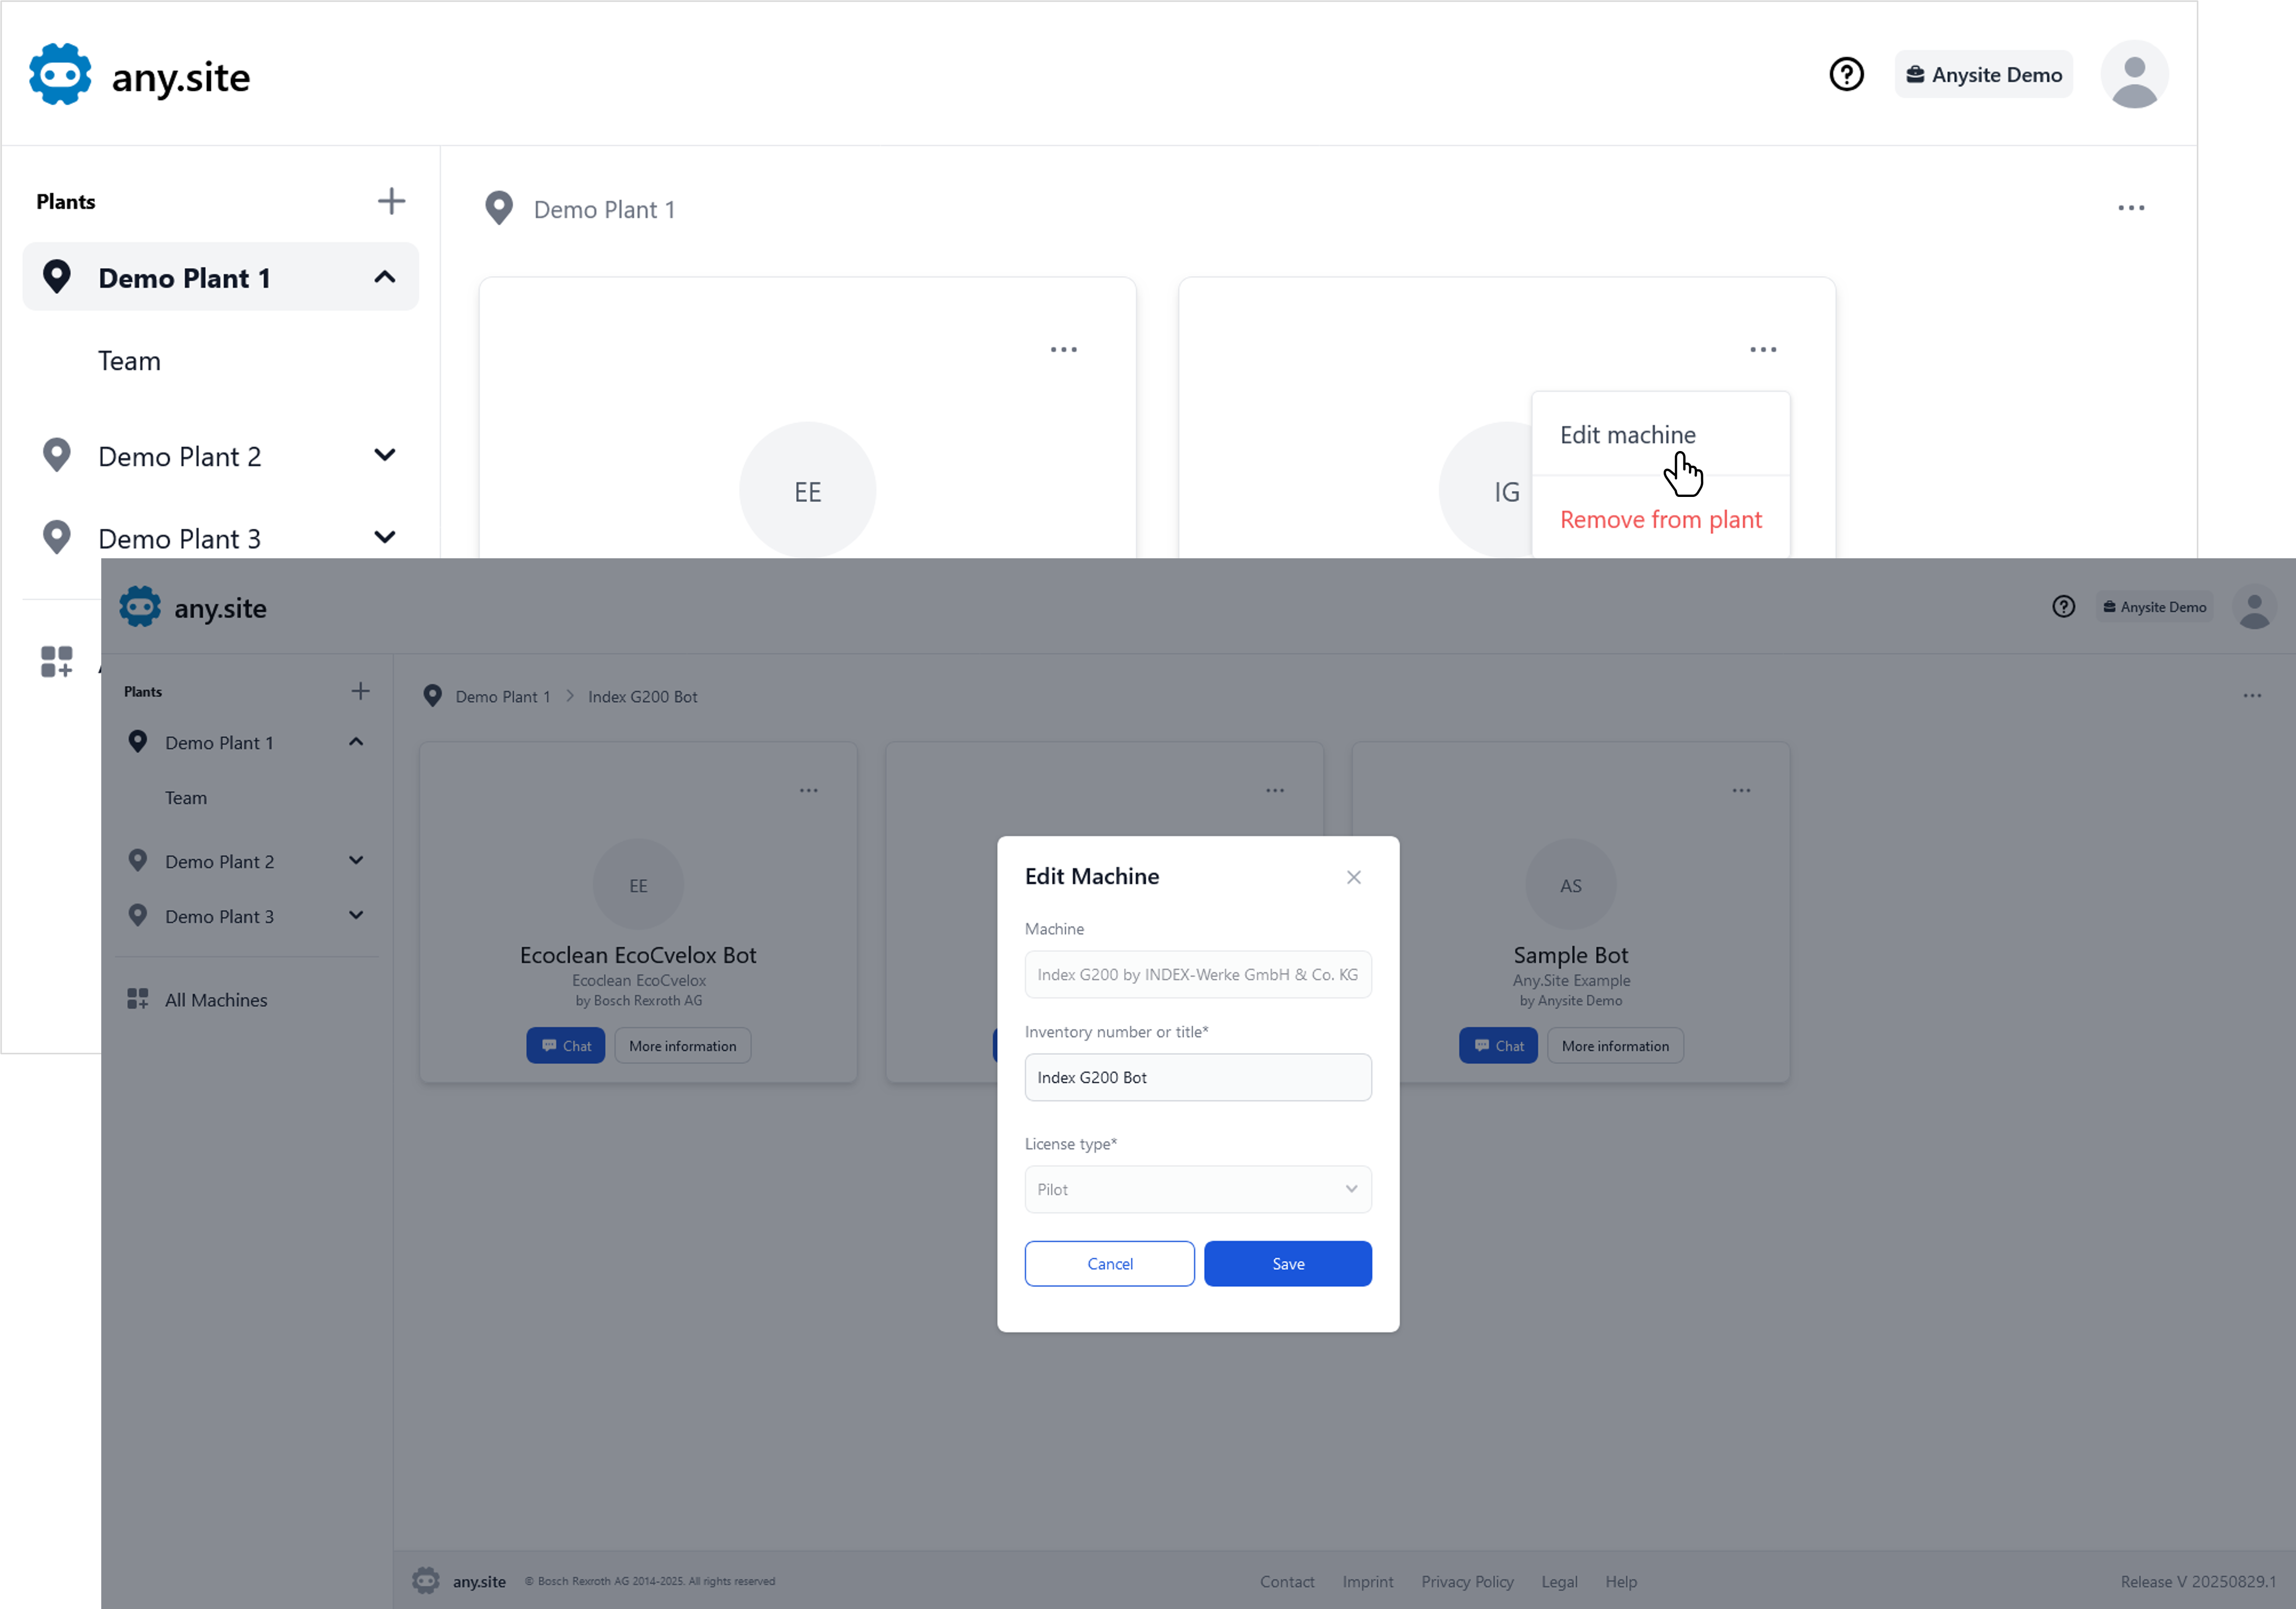
Edit bot details in a plant
-
Open your plant’s overview by clicking on it in the menu on the left.
-
Click Options in the top right corner of the bot tile, then click Edit bot.
-
Enter the desired inventory number or title in the pop-up window and click Save.
Remove a bot from a plant
-
Open your plant’s overview by clicking on it in the menu on the left.
-
Click Options in the top right corner of the bot tile, then click Remove bot.
-
Confirm the action by clicking Remove in the confirmation dialog.
Manage plant members
For adding members, changing roles, and removing users, see Manage users.